Monday, October 31, 2011

Happy Halloween!

Happy Halloween, my sweets!
(Sorry for the blur)
How was your Halloween? Did you see any unusually good costumes? I think my favorite was a 40-something-year old man at our church Trunk-Or-Treat who was Justin Bieber- sporting his daughters skinny jeans, a Bieber wig, hat, and headphones. I really thought he was a teenager at first glance.

A few days ago after my husband re-seeded our front lawn, I thought about making this patch into a little graveyard (secretly hoping the hundred or so trick-or-treaters we've had tonight wouldn't walk all over the fresh grass- it worked!) We had some spare wood leftover from another project, so I tried to draw a template and go at them with a jigsaw. After cutting the wood and painting them grey, I just layered more paint on with sponges and painted cracks, looking online for ideas. It also helped to water down the paint and drip it from the top. Grant helped put them in the yard along with an overhead light and some hanging ghosts. They're no masterpiece, but if you were to see our neighbor's all-out haunted house, you'd understand why we had to do something... anything! His house pretty much looked like the Youtube Party Rock light show video that's been going around.
I'm trying to catch myself up on journaling past projects so I can delete some photos off of my computer. These are a few of last year's simple decorations, cards, and cupcakes for Grant's work (I've found that grocery stores charge pennies for their cupcake carriers- that's where I get mine). Nothing fancy, but I have fun making them. Working at a floral design studio in Florida, I was able to dry some hydrangeas and cover them in curly willow, spiders, and webs for a Miss Havisham feel. I love that with it dry, it can be on display year after year. In case you didn't see this last post and like Halloween decoration's, here are some more simple, inexpensive craft's from this year.
Hope it was a great, happy Halloween for you! :)

Friday, October 28, 2011

A Cozy Fall Day

A few weeks ago, my husband and I took a road trip to visit my parents in Wyoming where they now live for half the year. They bought an old dude ranch for our family and have spent the past two summers gutting, restoring, and decorating the 1970's original cabins into what's pictured below. They have just about worked themselves into the ground, and the whole place is a night and day difference compared to the original. People thought they were crazy when they saw the original place, but my parents have always had amazing vision as to what they want together and are relentless in executing it. I hope one day to have even 1/10th of their vision.
Every year since I was born, my family has gone to Wyoming and Idaho for the summer. It's my favorite place, with so many dear memories. We spent some great time on this trip just driving through Yellowstone, relaxing, fishing and hiking, going on fall drives, collecting fall foliage to arrange in the cabins, and canning a whole bunch of peach jam from fresh Santaquin peaches we grabbed on our way up. On the particular day pictured below, it was rainy and windy, so we decided to stay inside and have the Pioneer Woman's Chili (a favorite- so easy) and corn bread for lunch. A perfect day, indeed.
Come on in to cabin #1, the farmhouse style cabin!
Meet Liz. The smallest of the dogs, yet ruler of the roost.
The Pioneer Woman's Chili recipe (I omit the jalapeno and reduce the chili powder a tiny bit, just personal preference. The masa is essential to the texture and taste. Enjoy with cornbread covered in butter and honey!)

Thursday, October 20, 2011

Pasta e Fagioli & giveaway winner

The staples from the upholstery job are all counted and came out to 295. If you include the hardware, it was 358! So, the winner is... my sweet friend Heidi from The Pretty Poppy (a very talented girl)! Thanks to you all for entering! Looking forward to more future giveaways!

Have you ever been to an Italian Market? I LOVE them. Right before we left Miami, I stumbled upon a darling Italian market with rows upon rows of cookies, eclair's, cannoli's, fresh pasta, fabulous deli meats and cheese's hanging from the ceiling, and aisles of imported pastas, olive oils, vinegars, and sauces. I really feel that a few ounces here and there of their flavorful cheeses and meats are a great way to inexpensively add standout taste to otherwise simple meals. I was so happy to find an excellent Italian market in Phoenix recently! A nice Italian gentleman followed me around the store, giving samples of fresh ground Italian sausage, smoked mozzarella, and cannoli cream- mmmm. The Italian owner walked through, educating me on his favorites, gave me a sweet "Ciao" as I left, and then ran outside to my car to make sure I had their menu.
I wanted to make a great Pasta E Fagioli the way I envisioned the hearty pasta soup- somewhat thick, full of flavor, and filled with texture. I used Giada De Laurentiis's Pasta e Fagioli recipe as an outline and added a few things, mainly, crushed tomatoes with sauce, and it added such great flavor. This might be my new favorite soup!
At the Italian market, I bought a few ounces of pancetta (an Italian-style bacon), imported San Marzano tomatoes (a must for putting this soup over the top), and kale (one of, if not the most, nutritious vegetable- which I normally don't like but was great in this soup!). The little white thing is fresh rosemary/ dried bay leaf wrapped in cheesecloth- a little bouquet garni.
Browning the pancetta, olive oil, onions, garlic, and crushed red pepper (so good in this soup)
After adding chicken broth, crushed whole tomatoes with sauce, kidney beans, kale, and three different shaped pasta's for texture- annelini from the Italian market, shells, and rotini (Some Omega-3 rotini with tri-colored rotini because I can't tell the difference)
There is so much texture and flavor in this hearty soup!
Topped with some freshly shaven parmesan
And, of course, we had to finish it off with cannoli!! Sometimes the shells are so thick and fried, but this was perfect and the cream was the best I've tasted. Buon Appetito!
Pasta E Fagioli (Adapted from Giada De Laurentiis)
Ingredients
1 large sprig fresh rosemary
1 bay leaf
1 tablespoon olive oil plus 1 tablespoon butter (if you like, I used only olive).
1 cup chopped onion- I used 2 small onions
3 ounces pancetta, chopped
3 cloves fresh garlic
3 cans low-sodium chicken broth
2 (14.5-ounce) cans red kidney beans, drained and rinsed
• 1 (28 ounce) can San Marzano certified tomatoes (picked by hand in Italy, they really make a difference if you can get them at an Italian Market or specialty store- I have made this soup using regular and it wasn't close to as good.)
I used 1/2 cup annelini, 3/4 cup assorted rotini, & 1/3 cup shells for texture (or use whatever assortment you like.) Giada uses elbow macaroni.
Freshly ground black pepper
Pinch red pepper flakes, optional- I used about 1/2 tsp or a bit more- not too spicy, but adds so much to the soup-delicious!
1/3 cup freshly grated Parmesan
1 tablespoon extra-virgin olive oil
Directions
Wrap the rosemary and bay leaf in a piece of cheesecloth and secure closed with kitchen twine. Heat 1 tablespoon olive oil and butter in a heavy large saucepan over medium heat. Add the onion, pancetta, and garlic and saute until the onion is tender, about 6-8 minutes. Add one large container San Marzano or high quality whole peeled tomatoes and crush by hand. Add the broth, beans, and sachet of herbs. Cover and bring to a boil over high heat, then decrease the heat to medium and simmer until the beans are more tender, about 10 minutes.
Discard the sachet. Puree 1 1/2 cups of the bean mixture in a blender until smooth* (I love using the magic bullet for small blends like this. Don't worry if you get more than beans in the blend. You can remove any of the pancetta fat at this point if you like).
Put the puree back in, add the pasta (I really recommend using a few different types of pasta for texture), and boil with the lid on until it is tender but still firm to the bite, about 7-8 minutes, as the pasta will continue to soften. Five minutes or so after adding the pasta, I added finely chopped kale, about 2- 2 1/2 cups. Stir well. Season the soup with ground black pepper and more red pepper flakes if you love the heat.
Ladle the soup into bowls. Sprinkle with some Parmesan and drizzle with extra-virgin olive oil just before serving (I only added parmesan.) Serve with crusty bread or garlic bread!
*When blending hot liquids: Remove liquid from the heat and allow to cool for at least 5 minutes. Transfer liquid to a blender or food processor and fill it no more than halfway. If using a blender, release one corner of the lid. This prevents the vacuum effect that creates heat explosions. Place a towel over the top of the machine, pulse a few times then process on high speed until smooth.

Saturday, October 15, 2011

A few Halloween decorations

Thanks for the comments about the last chair re-do post! If you haven't guessed for the giveaway, I'll be announcing the closest guess next week!
Are you all in the Halloween spirit? Christmas is my favorite time to decorate, but I love traditional and vintage, cheeky Halloween decorations. As much as I love the fun look of haunted houses, I'm not into the extremely creepy or gory decorations that are sold at so many stores today. My family can attest that I'm a first degree fraidy-cat and I also hate the evil that is now all too often associated with Halloween. Since we've moved quite a bit, having to store lots of huge holiday decorations is bit of a down side, so I always find myself going back to making paper decorations.
Come on in!
I had a banged up white/corkboard frame from a clearance rack. After painting it black, I cut out paper bunting and stamped it all with black ink. The tulle wreath is based off of something on Pinterest. As much as I love Halloween magazines and inspiration like Pinterest, I really like to just have fun creating from things I have lying around.
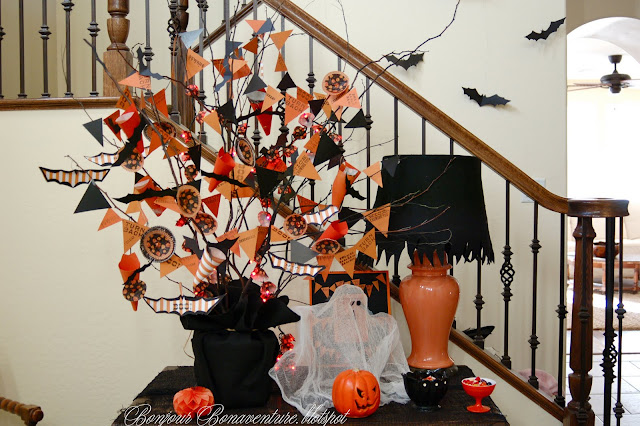
The bats are cut out with black paper and hung with fine silver floral wire and the old orange ginger jar lamp was bought for $5 at a thrift store. I cut out some black felt to lay over the shade.
I love Halloween trees after seeing the clever ones my mom's been making and displaying in my childhood home for the past 20 years. She was way ahead of her time.
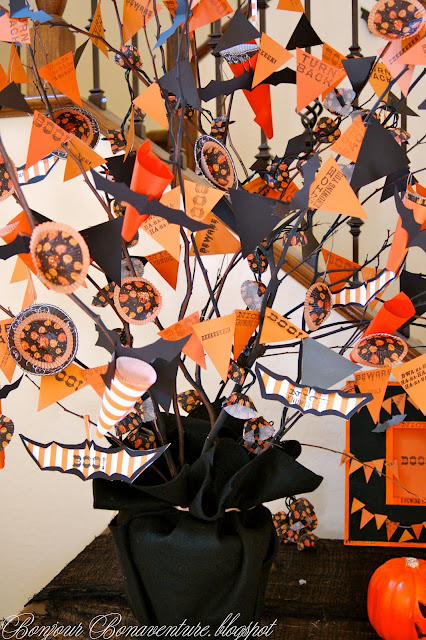
I took some old tree branches we had cut in the backyard and spray painted them black. The container is a pot stuffed with newspaper to hold the branches in place (could use floral foam, I didn't have any on hand) and then wrapped in some leftover black felt. The branches are wrapped in orange Halloween lights and then covered in upside down mini cupcake wrappers to make them look like mini lamp shades. The paper was bought on clearance from Michael's and then stamped with some Martha Stewart halloween stamps from last year that I love.
The ghosts were made with the old trick of putting them on a bottle with wire arms attached and then starching the cheesecloth and letting them dry. The eyes and mouth are felt cut-outs. The candy containers are vintage from my Grandma. I decided to hang some ghosts over our kitchen lights, and it's neat how they really look like they are glowing and floating mid-air.
What kind of decorations do you like/do? Are you going trick-or-treating with family? Our neighbors have a full-on haunted house, the hit of the whole neighborhood, so I think we'll have a few children coming by this year. Have a happy, cozy October and Halloween!

Tuesday, October 4, 2011

Reupholstering an antique chair & giveaway

It's good to be back! We just got back from a nice little vacation in Wyoming and Utah last week and I hope to post some pictures soon.
For now, I'd love to share a recent undertaking with you. My grandmother passed away last April and I was fortunate enough to help sort through her estate and keep a few things that were left in her years of collecting just about everything you could imagine (she was a child of the great depression and kept just about everything.) I have fond memories of seeing this chair in her living room and always loved the lines and hardware, but disliked the bright green upholstery. The detail on the arms and legs also went with a few wood tables my husband and I have picked out, so I decided to reupholster it. I'm putting notes below in case it helps anyone, but feel free to just scroll through pictures!
A few notes before beginning: Although every piece of furniture is different, I started by looking at these two tutorials: http://www.diyupholsterysupply.com/how-to-upholster-chair.html and http://littlegreennotebook.blogspot.com/2011/06/reupholstering-chair-part-1-stripping.html These are more helpful than any words I could probably offer!
After that, I took lots of digital pictures from different angles of the chair so I could remember how to reassemble it.
1. STAPLE REMOVING: I used a very small and thin flat head screw driver, popped the staple out part ways all the way around, and then removed them with pliers (a must!)
There were tons of staples. I started with the bottom of the seat, but here you can see how many staples were just in the top back of the seat. Within 5 minutes, the screwdriver slipped into my thumb, below. It just screamed, ROOKIE!!! I also managed to get two wood splinters under my nails and in my eye! Awesome!
I realized this would take a while and lots of patience, so I turned on Pandora and worked away for about half an hour just on the seat. But, I digress.
CAN YOU GUESS HOW MANY STAPLES, BUTTONS, AND METAL HARDWARE PIECES I REMOVED AND PUT IN THE BOX BELOW?
IF YOU HAVE THE CLOSEST GUESS, I'll SEND YOU THIS CUTE LITTLE NOTEPAD BY SHABBY CHIC. Just comment with how many staples you think I removed, and if you're the closest guess without going over, I'll announce you next week and get your address!
2. PATTERN: I removed all staples and fabric from the base of the seat, being careful not to rip the fabric too much, as it was my new pattern. The existing padding was in really great shape so I kept it (replacing foam can get costly). I then traced the original fabric pattern with yellow highlighter on the opposite side of the new canvas and cut it out carefully with fabric shears. Laying the pattern back on the chair, I stapled each side down, starting in the middle and then pulling the fabric taught and stapling to the left and right (see tutorials linked at the top of this post).
3. FABRIC- I love bright patterns on chairs and was tempted to do a Ralph Lauren style navy fabric, but decided on something neutral to match our off white canvas couch. I chose a white cotton canvas remnant I bought for about $3 at a fabric warehouse. After removing the fabric, I kept the original tack and cardboard strips to use in recreating the nice, clean lines on the back of the chair.
4. STAPLING/ TECHNIQUE: I was tempted to rent a pneumatic staple gun and air compressor from Home Depot for some projects, but realized my $20 or so stapler would probably work just fine (I later realized my staples suggested on the box of my gun went in about 3/4 of the way, but the wood was so hard that I had to hammer them in with a mallet the rest of the way). On the back rest, I also started by stapling the center top down and then moved across the left and right sides of the top. I flipped the fabric over the front of the seat and stapled the opposite side down, then flipped the fabric back over and inserted the tack strips to the left and right sides. These were then folded under so the sharp points could be hammered into the left and right sides of the back.
(You can see the tack strips on the opposite side of the fabric here).
(Picture before I folded in the lower left and right corner)
5. FINISHING THE BOTTOM: After doing the bottom seat, then top backrest, I took the black base sheet I had kept from the original upholstery and stapled it back on the bottom to give it it's nice finished look.
Done! I love the original hardware pieces, still debating whether I want to put them in as some friends say they love the simple, clean lines. I do too.
(You can see I left a tiny bit of slack to add the original buttons). Good luck guessing on the giveaway- I hope you enter!